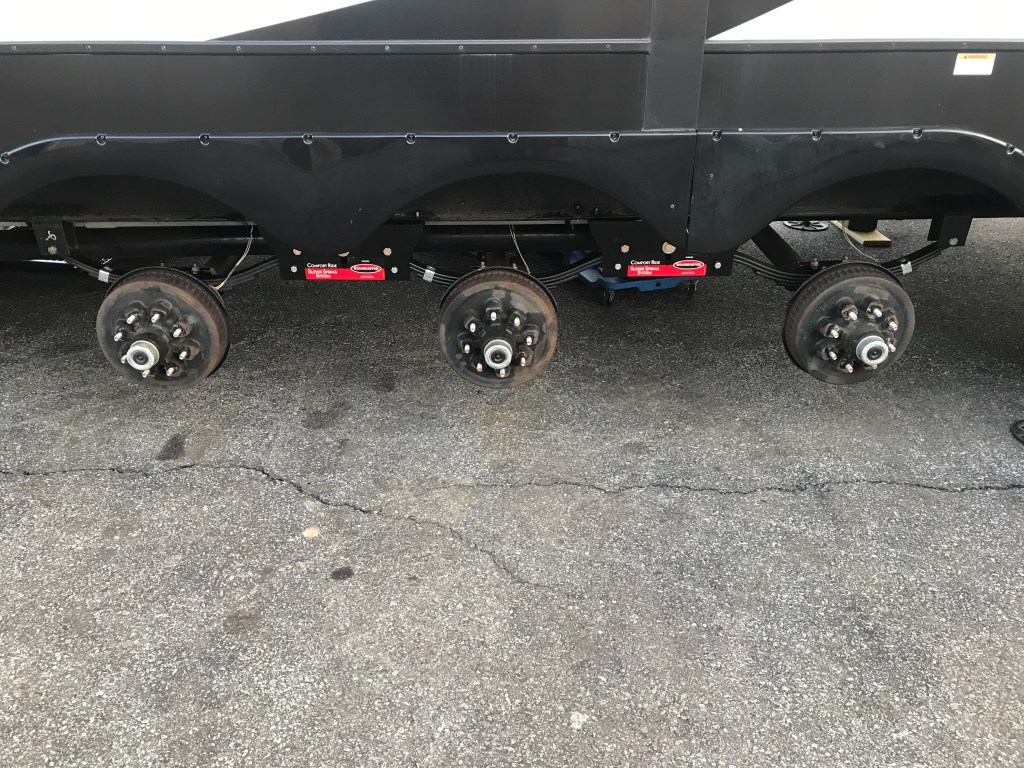
When you drive 1000 miles and find things that were reasonably packed in disarray or broken you stop to think. Now, the only area where this is prevalent is the garage. Sticking out behind the axles it whips up and down pretty good. The rest of the coach seems to be OK. Of course we’re not in it to feel the ride. There are also quite a few reports of suspension failures. I think a lot of that has to do with poor suspension design and undue stresses on the hangers/leaf springs. Hanger welds are critical and often done poorly. Some manufacturers install reinforcing brackets…..With the minimum setup we have leaf springs with one end in a hanger and an equalizer on the other side, with the center axle sitting in two equalizers. There are tons of videos on Youtube showing how one axle going in a pothole jerks its buddy around. And all that translates into the coach as well as to the hitch. There is room for improvement. Here are the levels I see….
1 – Nothing. Springs, hangers and a few cheap equalizers.
2 – Upgraded equalizers. Lippert, Moryde……there’s one with a stabilizer bar that goes across. $ Hundreds…..(Our unit came with the Moryde 3000)
3 – Shocks. Add on kits by Roadmaster. Bolt on except for some holes to be drilled. $1300 for the tri axle. Dampens the ride considerably. (Watch the videos on Roadmaster’s website…..)
4 – Shocks and slipper springs. One end of the spring rides/slides on a pin. Nothing new here, been used for decades on trucks and trailers. Axles are now independent of each other on that side. Left and right wheels are still on the same rigid axle. Roadmaster Comfort Ride $ 3K
5 – Moryde fully independent suspension. They must install. It’s awesome. $ 8K
I debated between 3 and 4….. and settled for 4. Here are the required part numbers:
2 axle slipper spring kit for 7000lb 3″ axles: RM- 2570
Third axle slipper spring add on: RM 2570-50
2 Axle shock kit: RM-2460
Third axle shock add on: RM 2460-50
For those that are wondering, Roadmaster does NOT recommend using wet bolts.
There is ONE reseller that has the 3 axle kit….. they piece it together and charge $3K (eTrailer.com) I went looking for the 2 axle kits and the add ons……except the add ons had 4 leaf springs and 4 shocks… HUH?
So I called Roadmaster, who couldn’t clarify this mystery, but told me what I needed (the above part ##) and I bought the 4 kits directly from them, $2620 on my door step. Some seriously heavy boxes. UPS guy is hating me…..
Some assembly required:


Time to take the wheels off. Easy. Loosen the nuts, use the levelers to crank it up and viola. Not so fast Pilgrim. Ever hear of “excessive angle” or something to that effect? Didn’t look like it to me. Driveway slopes a little. Maybe it will work on the other side. I first loosened the bolts with a socket/breaker bar/pipe combo to feel how tight they were. They all appeared to have correct, and similar torque.
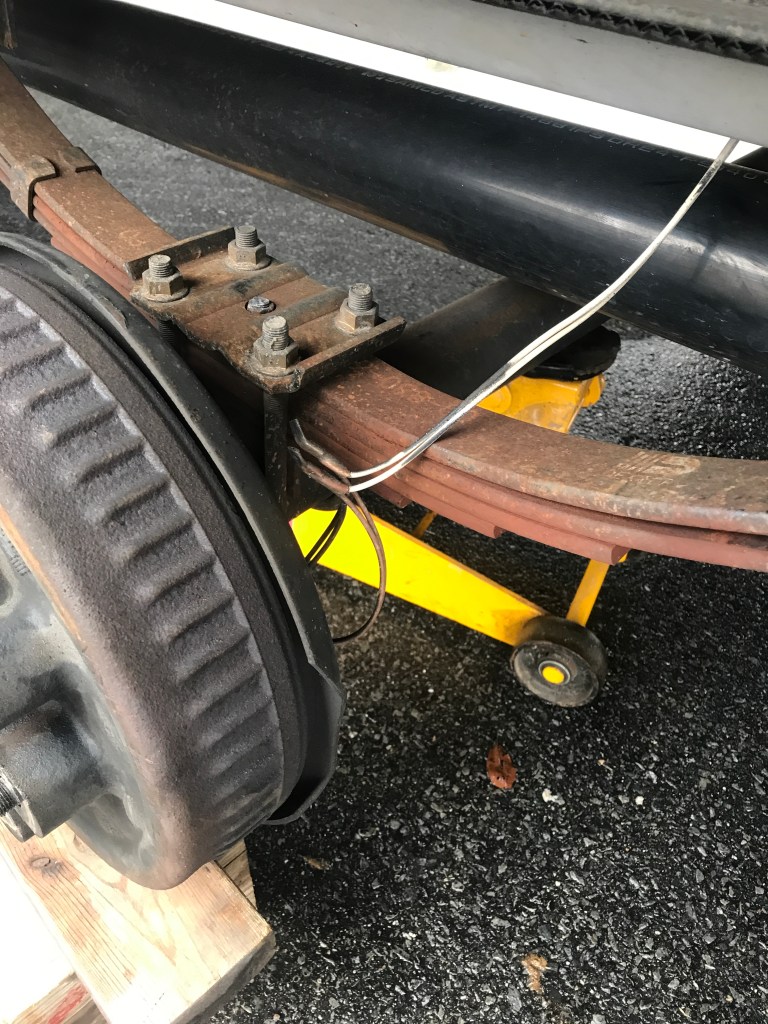
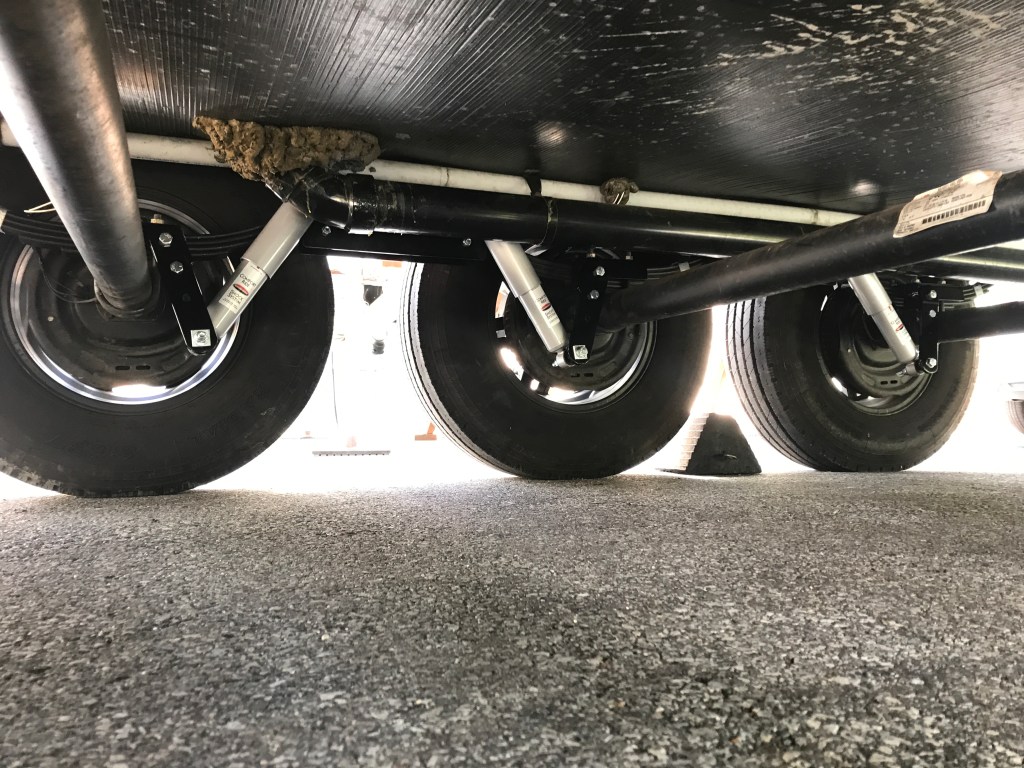
The cribbing is there as plan B. The odds of the leveling system failing are very slim. Still, should it happen the cribbing should catch the thing. Not quite touching. And on the forward one there’s two conduits that are going to bite the dust if it comes down.
Note the supports under the axle. You don’t want them going anywhere when you take the U-bolts off. The installation instructions say to put the WHOLE trailer up and take ALL wheels off so the axles are “dangling”. That’s a lot of cribbing…. Used the wheels too. But it is important that the axles are dangling free when you put this together.

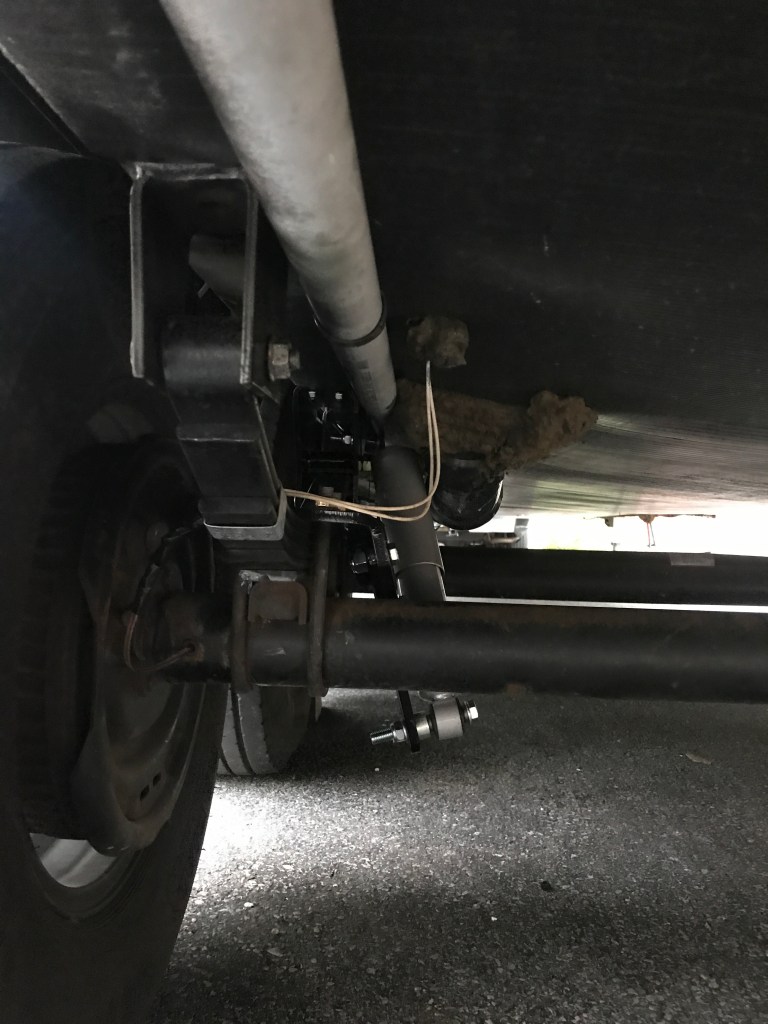
What I was NOT…. repeat NOT impressed with was the brake wiring. This is a clear chafe point and when it goes through it will not only mess up the braking but might short the whole thing out sending a lot of angry pixies into one of the 137 computers in my RAM space ship. Oh no…… For now I will tape it up and give it some buffer. I don’t have any wire length (visible) to work with so I will wait until the bottom cover comes off to deal with this.
And then I noticed, standing at some distance, that the springs are really not that big. Lot of abuse though. No wonder they break. Again, I hope the slippers will reduce some of this stress.

On to further disassembly. I am not going to give a play by play here. I will add to the instructions….. They say to take the bolts that are splined at the top out with a center punch and hammer. Well, first off on the left side there’s a PVC pipe with a fuel line in it, AND the sewer pipe from the aft tank in the way. Plus, some of them are IN THERE. And a punch and hammer is asking for bruises. I took an oversized socket and a large clamp (leave the nut on so the bolt is JUST below the edge of the nut then….. turn… turn….turn…. POP. Easy peasy.

This is what was left of the most aft “bushing” after an estimated 6000 miles…… Again, not impressed.

And viola….. everything off with only minor bruises and cuts.

Then the instructions talked about obstructions. Straps holding the fuel pipe and the sewer pipe. Loosened and shoved out of the way. I’ll find a spot for them when it’s all done.
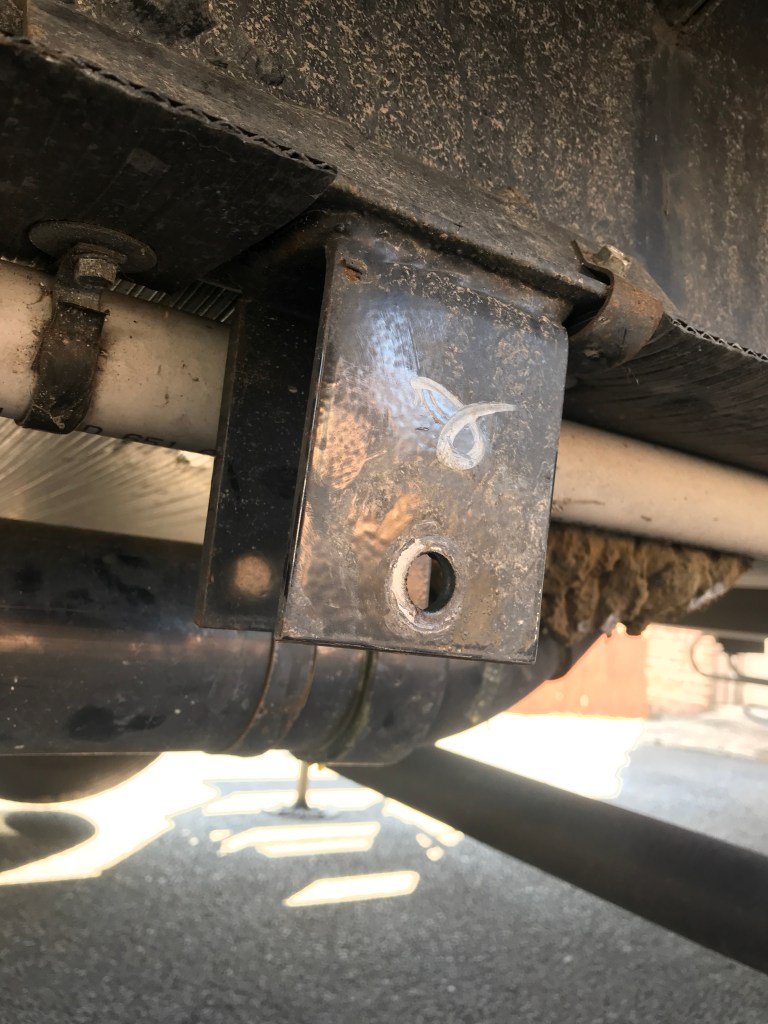
And here is the first slipper box in place with the first self tapper in. The first Bosch bit was bent…. at $20 no less….. The second one was straight and cut it like buttah….. 🙂

TIP: Stick your legs in a large garbage bag when drilling to keep the metal chips off you.

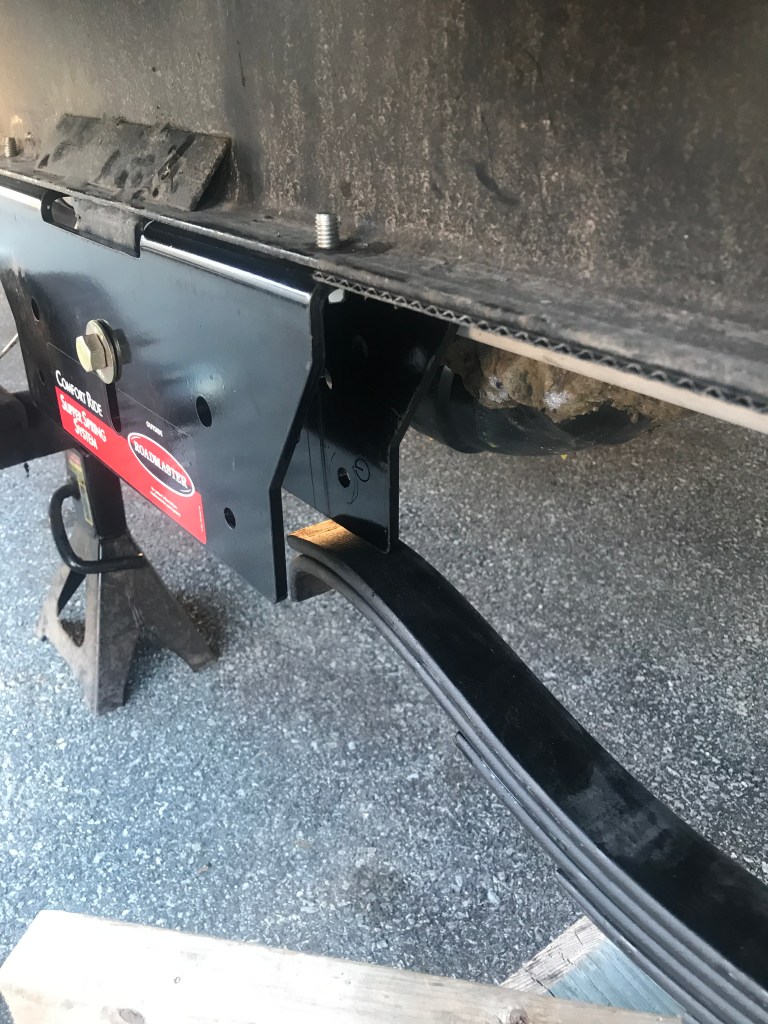
And here are both boxes installed, and the brackets/straps securing the fuel conduit and sewer pipe re-secured as close as possible to their original location. There is drilling needed for the self tappers, and the springs would be in the way of the drill, so now was the time for this.

Installing the springs was next. I started with the rear spring. In its hanger with the original bolt, nice and tight in a healthier bushing. We’ll see how long it lasts. HOWEVER….. look at the slipper side….. well over an inch out of whack….. Houston we have a problem……. In this picture the spring is NOT connected to the axle, so the other side of the axle has no impact on it. It’s strictly between the old hanger and the slipper box.
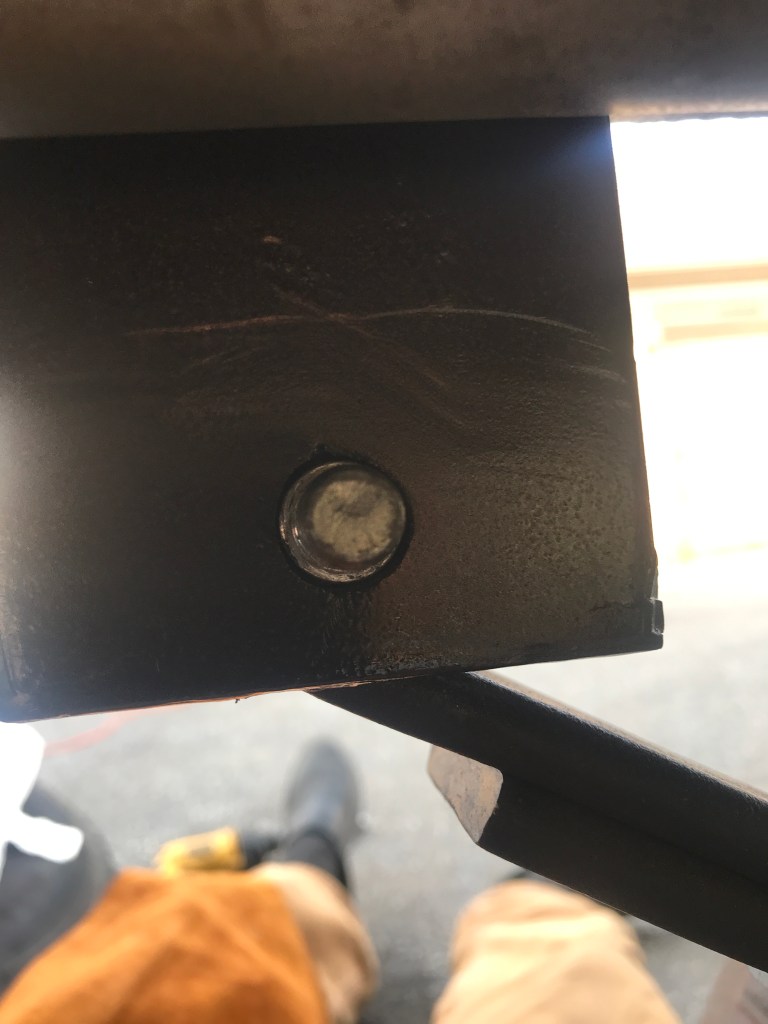
After spending some quality time under there (in 38ºF) with tapes, straight edges and such equipment it appears the rear hanger is slightly out of whack. As in Lippert screwed up. Again. This would explain why the bushing (and quite a bit of the spring) was blown out. And slightly out of whack translates into quite a bit at the end of a 2 foot arm…….. I spent a lot of time thinking about this. The perfect solution is to remove the hanger and re-install it properly. That’s not an easy task. While I do have welding equipment, I am not sure that I would trust my skills enough to do a weld like this with such a high failure rate as it is. Then again….. Lippert, who knows how good the welds that are there are….. The other option is to tweak the bolt a hair by moving one of the holes, a little. I’m thinking the nut-side as I can come in from the other side with the spring in proper position. Filling in one side of the hole with a little weld and removing from the other (we’re talking 1/16″ maybe here, but again big difference 2 feet away) does not affect anything structurally as far as the hanger coming off the frame. And that’s what I did. Here it is with the hole widened and the spring now installed and lining up with the axle and the slipper box.


So it turns out that the 4 shock kit they sent me was for a 2.5″ axle (bracket on the left). (2450 versus 2460) The shock add on kit was for the correct 3″ size. (on the right). Fortunately I was able to prove this (happened to still have only THAT box) so they kindly sent me the correct brackets two day air from Washington and a return label for the wrong ones. The brackets are the only difference between a 2.5″ and a 3″ axle. While waiting on the correct parts I used the two I had to put the left rear axle on the spring…… Pretty happy with that. We’ll see what happens when we do the other side.

As promised the parts arrived and I was able to secure all axles. Everything lines up nicely, but I’ve now also demo’d the other side. so the door side of the axles are all sitting on a block of wood. As you can imagine, taking the far end of the axle and moving it back and fort will directly affect the position of the slipper spring in the box…… So we won’t know how well (or not) things are aligned when we put the axles back on the other side.
Meanwhile…… lightly used springs anyone?

Sooo did the other side without having to get the welder out again. Put the axles and wheels back on and let her down on her feet. Pretty happy with how it’s sitting. Now it’s time for the shocks….

Shocks.
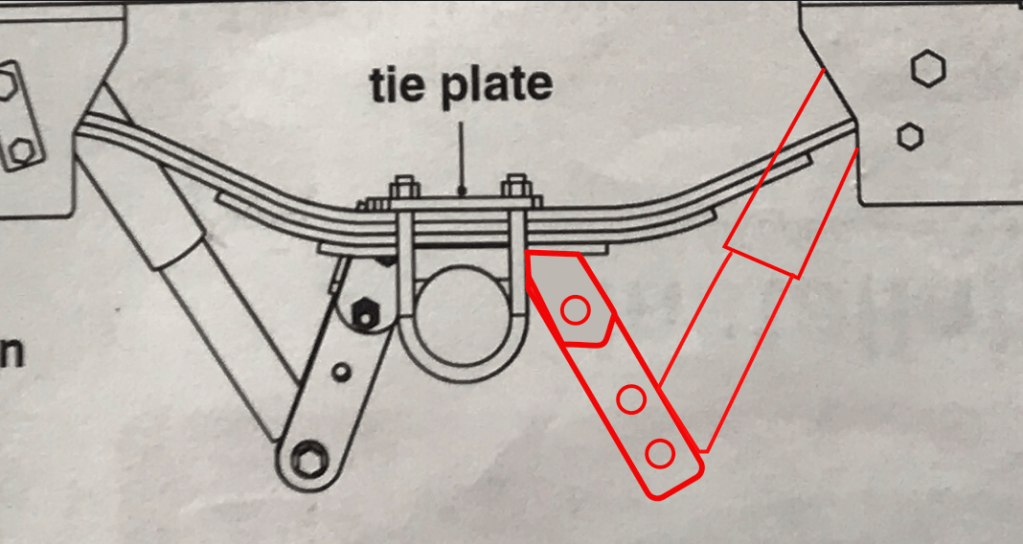
Here the instructions were a little fuzzier. Some better pics would help. From the expanded parts diagram I was able to figure it out and started putting it together. Well…… It wasn’t pretty. They were all angled towards the center as well as fore and aft. A lot. So much in fact that the provided shims were not enough to get the bolt aligned with the shock and after tightening the rubber in the top of the shock was quite a bit out of alignment. After a lot of fidgeting I figured out that the top could go on flat, without the provided wedges to angle it, and the bottom could be on the other side of the mounting bracket, with the wedges on the bolt. This all lined up quite nicely, and there was sufficient clearance all around.
But…… the center shock was way too long and could only be mounted 1-1/2″ compressed beyond the installation mark. So I called them, explained my issues and my solutions. “Sounds good” was the reply…… Ok then. Onward.
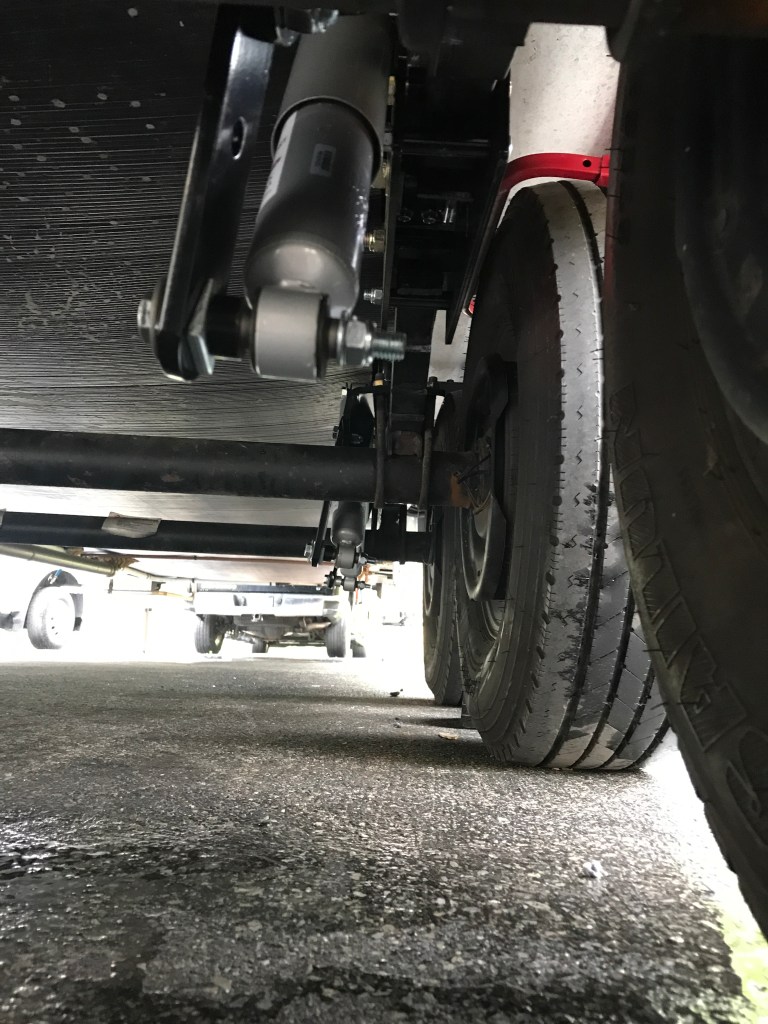
Here is the initial mount inside on the left most rearward wheel. Note the side to side angle. The wedges were not even close to filling the gap at the top…..
Here a shot of the right side with the shock on the outside of the bracket, with wedges on the lower bolt and the top bolt flat. MUCH better…..
Left front two axles. Note the increased depression on the center shock. I was depressed almost 2″ past the “Install here” arrow…. Total travel is 3-1/2″ so that leaves about 1-1/2″ of compression. Hmmmmm.

After looking at it some I realized the 4 shocks that worked were all to the slipper end of their respective springs. The center ones were to the fixed eye. Hmmmm. So I flipped the center tie plates which made the brackets face aft. I then installed the shocks to the aft boxes. Still over compressed, but not nearly as much as before. Much better.

Front of trailer to the right in the following picture
Soooooo….. here we are. All installed, after a lot of re-engineering. This does NOT work as advertised out of the box, period. Now, to be fair this is a “one size fits most” product and we all know no two units are the same, not even the same makes and models let alone across hundreds of brands and models.
Soooooo…….I called them again and showed them my issues and solutions. But that’s where things turned ugly. Although very polite, the (different) person I was dealing with this time was NOT technically oriented, and he was stonewalling me to death. All that came out of him was “You’re not doing it per the instructions”. “I know, but if I do it per the instructions it doesn’t fit at all. I fits marginally the way I did it, and I don’t think it will affect anything negatively.” “But your are not doing it per the instructions”. And the same thing again after he “Ran it by engineering”. Not sure how he could explain to engineering what I was trying to tell him as he clearly didn’t understand what I was saying, and/or didn’t want to talk technicalities with me. He was there to help people read the instructions. That’s it.
“Please let me talk to engineering.” But I was not deemed worthy enough. “Oh and if you do this we will void your warrantee.” Nice.
Soooooo……. Here’s the takeaway: I believe it is a cool product and will work well. But it doesn’t always install as advertised and then “Follow the instructions” is all you’re going to get. I’m not an engineer but I’ve been messing with boats, RV’s, cars trucks and lots of other mechanical things for a half a century. I have had to hash technical issues out with engineering before. No problem, shit happens, we fix it. The treatment I got from Roadmaster, unfortunately, makes me second guess doing business with them. “Follow the instructions” is not a fix. It’s a copout.
One more thing, the road test. Proof and pudding and all that.
350 miles Westward along route 80 in PA. A few pieces of road here and there that are not the best. Quite a bit of chucking. Now, in all fairness I haven’t had the rig on this road yet. Also, there is another variable which counts a lot and that is the pin weight. On this trip there was little load in the kitchen, bathroom or bedroom. There was a fair amount of stuff in the garage, so we may have been a hair light on the pin. The Goosebox didn’t show it but I am not convinced of the “resolution” of that gauge.
Inside the trailer was a completely different story. Last trips the stuff in the garage got tossed a bit. That far behind the axle there’s quite the see-saw action. This time however NOTHING moved. Not even a hair. And I really mean NOTHING. Inside the galley cabinets the same thing….. I am impressed. Just for this, I would do it again in a heart beat.
Hope this helps, I know it was a bit lengthy.
