I went through years of soul searching about this. Fort Wilderness, Coopers Lake Campground and around the house (with a little trailer behind it for grounds keeping) a golf cart would be quite useful. But which brand and model, and gas or electric and most of all how much to spend. Same as everything else golf carts have seen some evolutions creating pretty snazzy rides. Then, a few years ago, I was walking around the Tampa RV show and ran into these…..

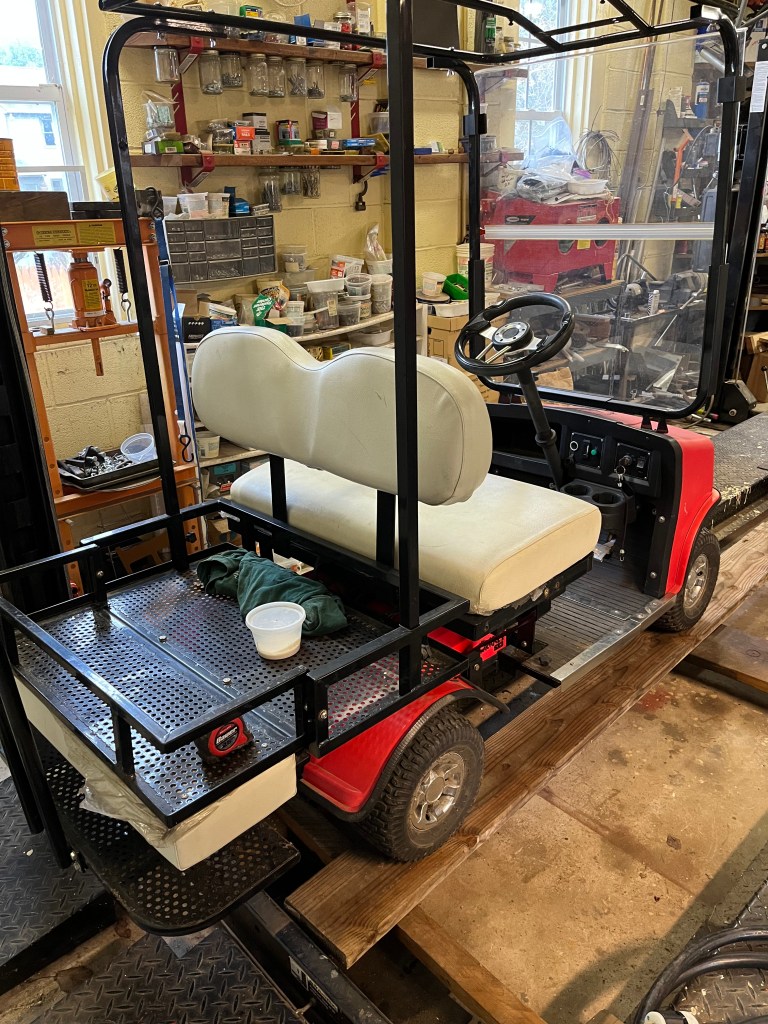
A ride for two and some stuff…… And it wouldn’t fill up the whole garage in the Toy Hauler, or at home for that matter. It could even easily go into the bed of the truck, or the back of the Suburban. (They fold down quite a bit for transportation). Except they were not cheap: 5 grand plus plus. And only occasionally spotted used on Craigslist or FB market place until late 2022 when I spotted one on FB market place. And right down the road too! Drove out with a covered trailer for convenience and a deal was made. Truck for scale.

Faded paint and new but small batteries. A dust boot on the steering that was dried out and disintegrating. Plus there was a freeze-zilla going on outside so taking it in to the shop and getting it on the lift was the obvious choice. Well, you know how that goes….


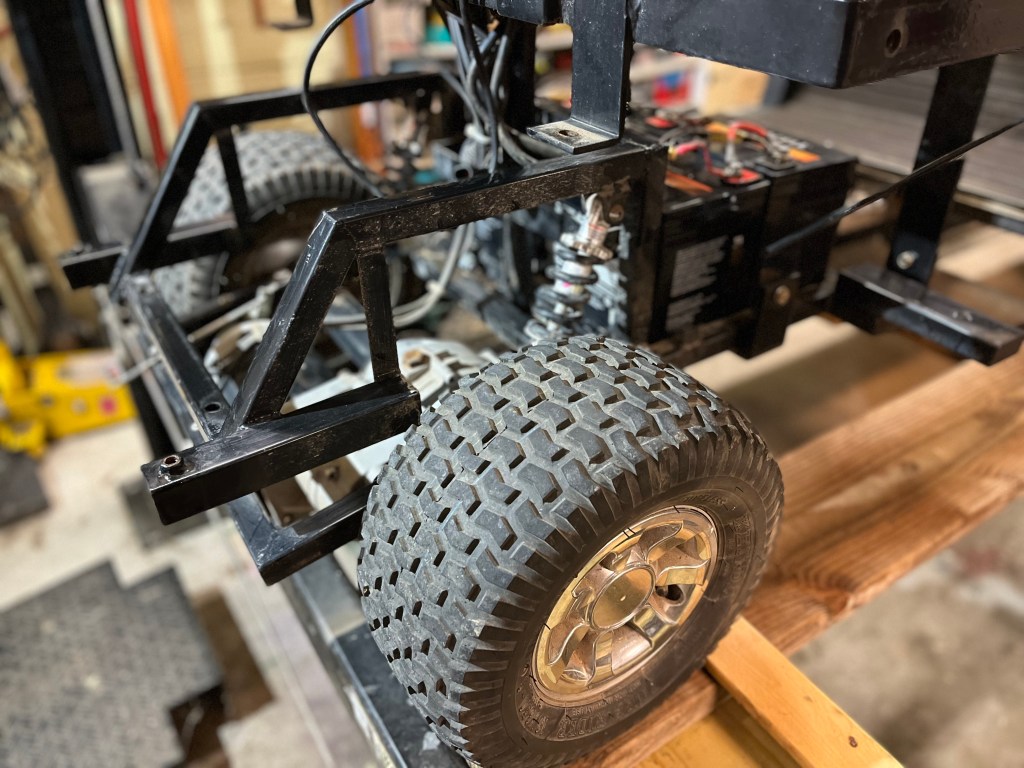
As I was peeling off the layers I found most of it in decent shape. A question about the reduction gear oil level/service interval was not addressed in the book. So I called a dealer who shall remain nameless. 90W. “Stick your pinkie in the top hole and it should be about halfway up”. Well, my pinkie didn’t fit in the hole at all. And that would have been an almost full casing which is very unusual and when I drained it a lot less than that came out. Called another dealer and they told me it was a splash system and there wasn’t a lot in there. (Couldn’t give me an actual number) This did make more sense though, so I replaced it with the same amount of (much cleaner) oil. Estimating it was around two cups. While I was talking to them I ordered a new top and the rubber steering boot. Also found the paint on the plastic (it isn’t fiberglass, feels more like polyethylene) to be beyond restoration with polish/wax and decided that the trouble of a paint job was worth disassembling. Which got me a much clearer picture of the electrics. Which brings us to the batteries…..
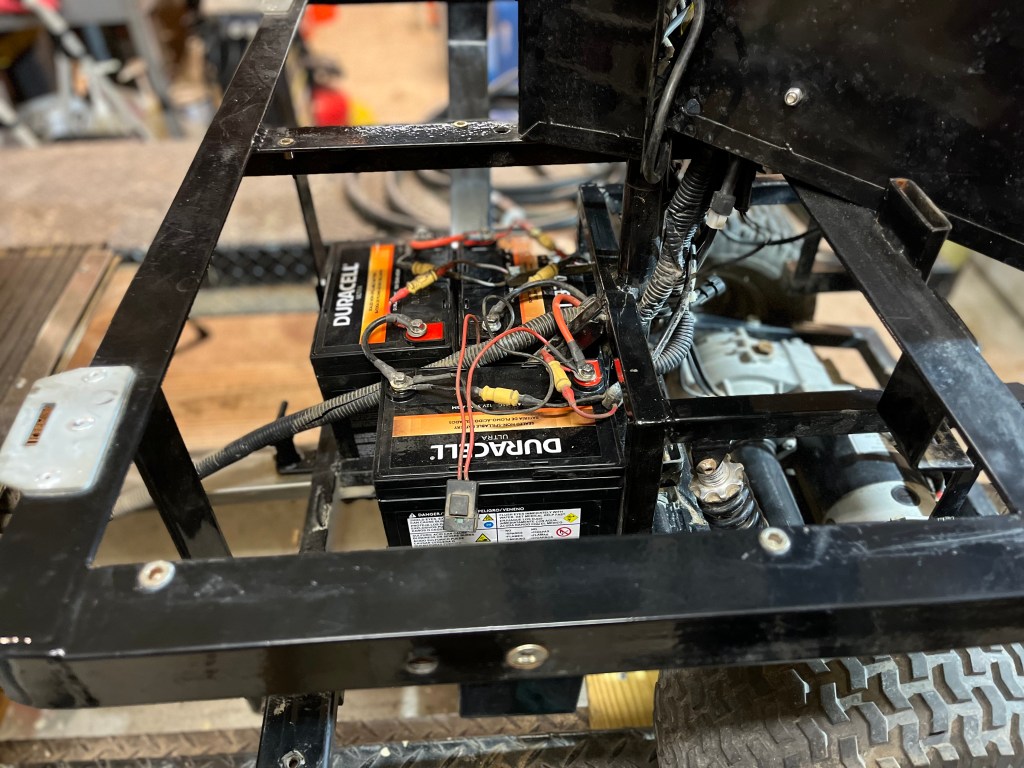
Three 12V 35A Duracell LA batteries in series for the 36V system. I believe there is a slightly higher capacity battery available in Lead Acid, but as it stood I had: 35A*36V= 1260W. Using the 50% discharge rule for longe(r)vity that’s 630W. The motor says it’s 800W, so lets say an average of 80% power chooching around that’s 630/640= call it an hour. Hmmmmm. Some places I go would never let me hear the end of it if I had to get towed home by a gasser. And the “fuel gauge” up front was no doubt a volt meter by another name and thus useless for determining SOC. (State of Charge) which can only accurately be done by counting amps with a shunt and condition monitor. Or by a BMS…… yes. LiFePO4. Again. After my project with the inverter power in the truck it was only logical.
Sooo, batteries, a way to monitor SOC, and a way to charge. How many Watts? What would fit? Long story short I ended up with the ReBel brand, again 3x12V in series. 50A*36V= 1800W, 90% usable is 1620W. Using the same assumed 80% power usage at 640W that is just shy of 3 hours. That’ll work. And a proper way to monitor it as these little guys have a Bluetooth BMS. Download the BMS manufacturer app that goes with them and viola. More on that later. As an aside, ReBel is a company owned/run by Vets in the USA. Took this shot a few hours after I ordered them……They were $270 each.

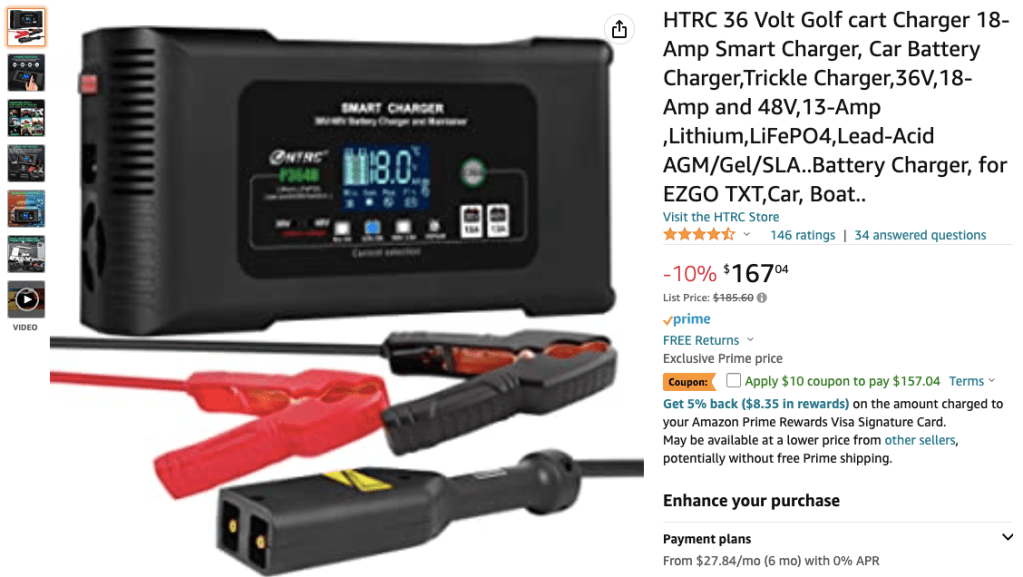
Looking for a charger I went back and forth a lot between expensive and not so. In the end I went with this one. Some sharp sounding dudes on Youtube didn’t seem to hate it. I’ll be able to keep an eye on what it’s doing to the batteries through the app.
Last but not least I need 12V for accessories. An outlet and whatever else (Mwahahaha). So I ordered this plus a few bus bars. I did this rather than tie into one of the batteries like the LA setup had. Opinions on whether to do this with LiFePO4 vary, but I feel that I need to treat the 3 batteries as one unit, as if they were in one box, especially since I MAY put an inverter in to run a tool or two in the yard. Certainly won’t hurt to take the conservative path here.

One of the things I noticed during disassembly was the wiring harness going to the forward panel. It kinda ran right through the middle of the battery compartment which cluttered it up. As I was going to have to get creative with the new (slightly larger) batteries and could use the extra space I noticed that the thing was not routed as directly as it could be. So I took all the zip ties off and managed to get some extra length out of it.


And here it is tied up. Yes I know, the way it is you can’t retract the thing to it’s smaller length. I don’t plan on needing to do that. And if I have to it’s a few zip ties and done. Meanwhile it’s neat, protected and out of the battery compartment.

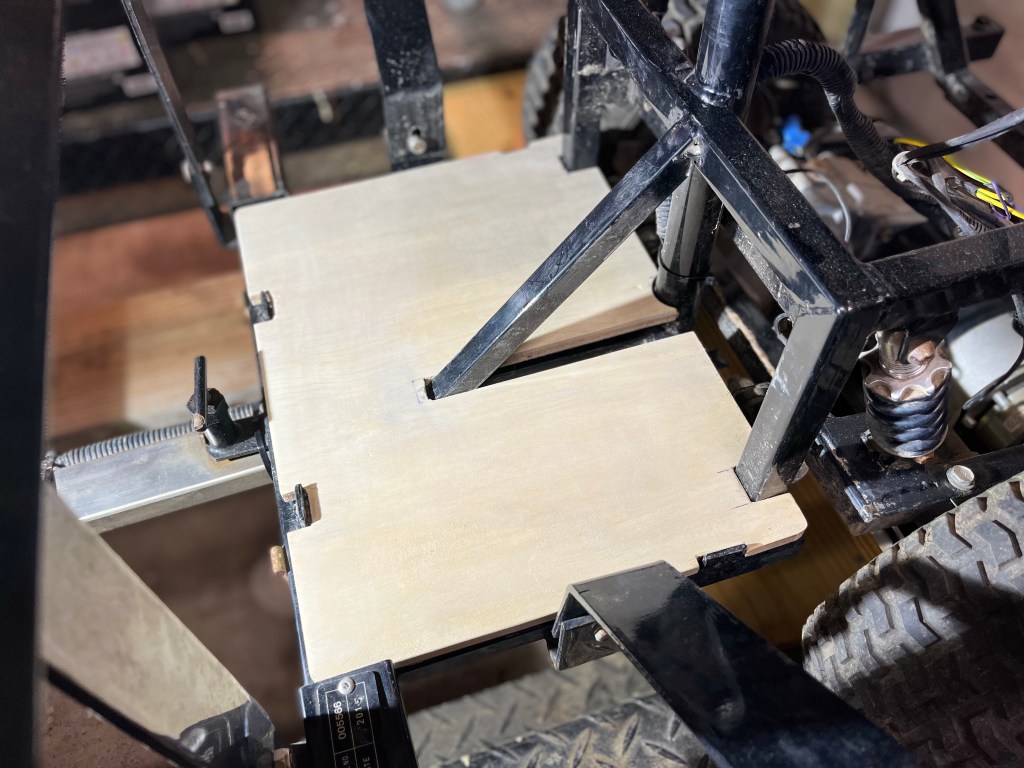
Next was the battery compartment itself. The trays that were part of the welded frame were (slightly) too small for the LFP’s. So I decided to start with a wood floor bridging all of it and providing the most space I could have.
Gave it some paint and while that was drying and I was waiting for the batteries to be delivered I replaced the dust boots on the steering and gave the front end some grease and general TLC.


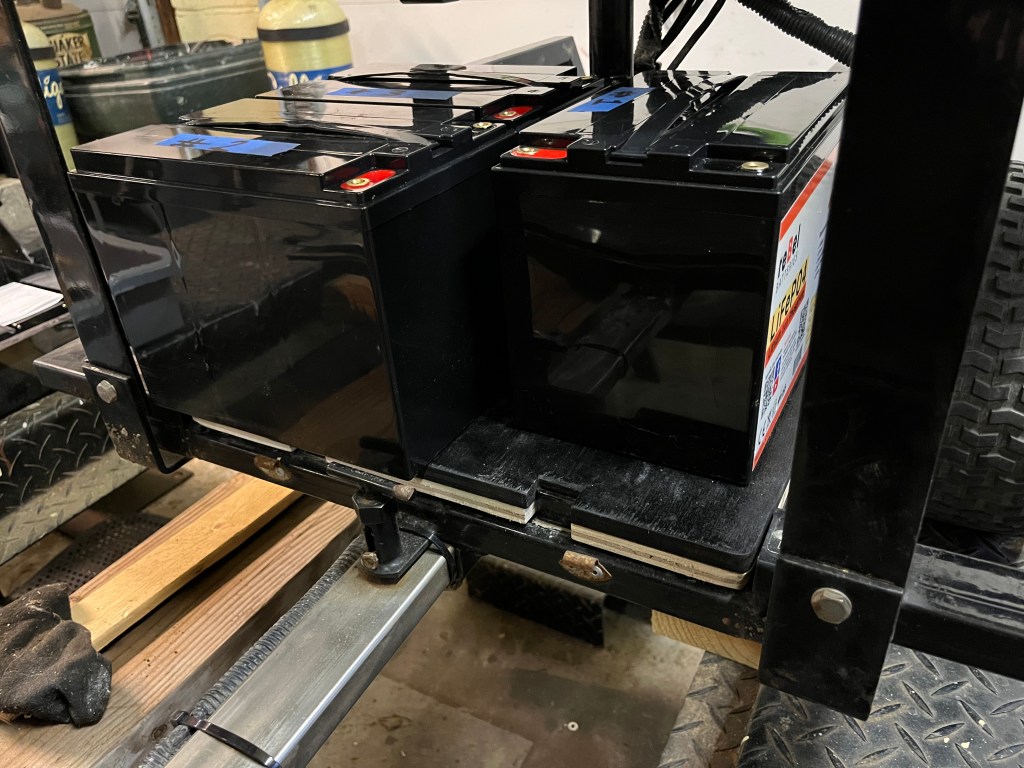
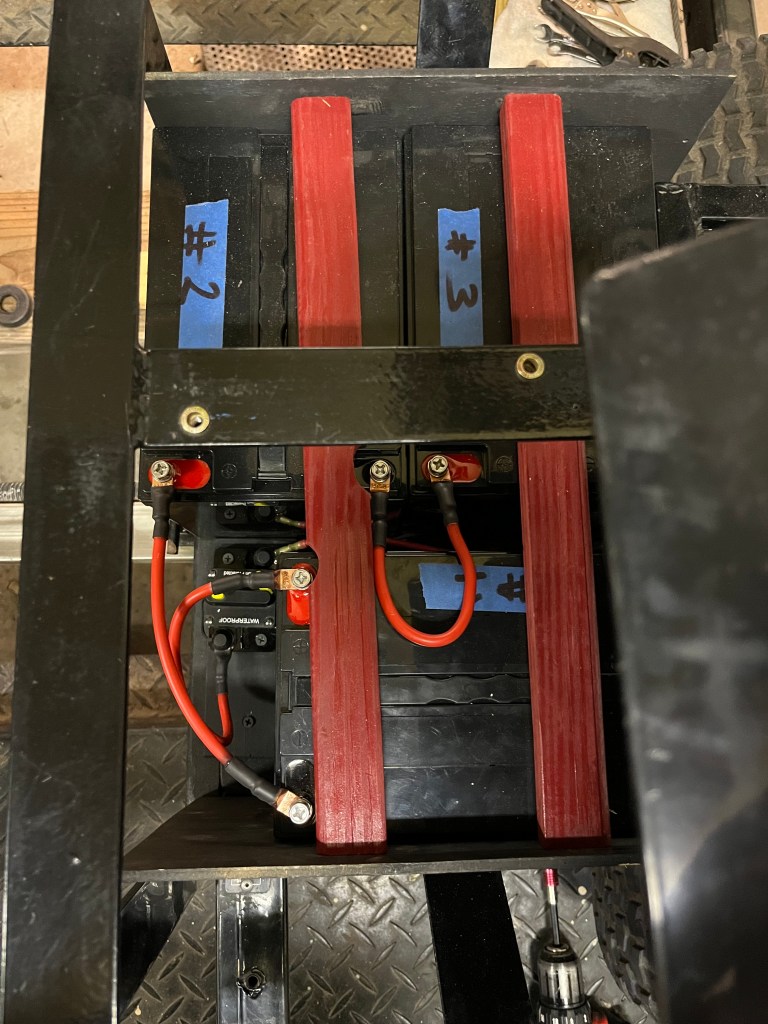
So the batteries arrived. Out of the box I got the meter out and they were within .01VDC of each other. That’s balanced. Fired up the app, spent $7 or so on the pro version so I could get to the settings and viola……. I love technology. (when it works) Hooked up a light to figure out which one was which by looking at the draw on the app and added a number to the device name. The one below is #3.

So, next step was to install them. Not so fast pal……… Somewhere in the, admittedly tight, design of mine we ended up with more battery than floor and two were resting on the steel tabs sticking up, which was bad. So I doubled up the floor. (It got painted after the shot) Also after the shot I built out the front of the floor to be flush with the batteries.
After that it was a matter of securing them and enclosing them. Some craft time with Luan and assorted wood blocks. Original setup unmolested except for two 1/4″ holes drilled in forward seat frame supports. Most of the fasteners are screws into the wood floor. I also put the diagonal support on the outside of the bottom frame tab.

Note the bars across. Wood, screwed in from the sides. Also gives the enclosure improved rigidity. The DC main circuit breaker/main switch roughed in on a block that immobilizes batt #1 and #2 This one is 40A, I have a 100A as a backup. In theory the 800W motor draws 800/36=22.2A But we all know motors pull a multiple of their max when starting up. Then again, does that apply when using a “gas pedal” and bringing the load in over seconds not miliseconds? Trying to get a handle on the inrush current is a challenge. (Later on when I got it hooked up I put the rear wheels in the air and “floored” it which drew 112W per battery. We’ll see what it does on the road.)

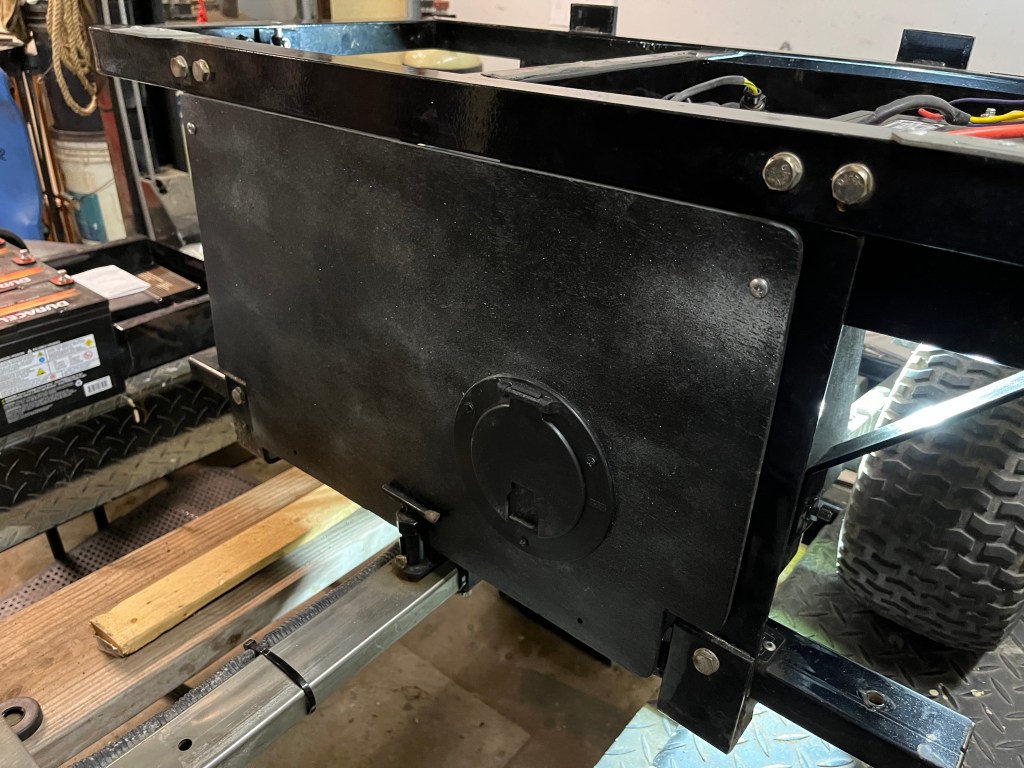
Last was a front and top cover. An RV style access hatch for the breaker. These were the only two farceteners that required drilling.
Next…… Wiring. 8AWG for the battery cables. Important to keep the two between batteries (the series cables) the same length. Hence the loop in the second one. Same goes when paralleling. As discussed earlier I ran a 32V line to the right side box under the seat for the 32 to 12V converter and the charger.
The boxes under the seat. No changes in the controller box, the other one holds the charger, the 32V to 12V converter and two sets of buses (one pos and one neg each), one for 12VDC and one for 32VDC. A 3/4″ piece of plywood in the bottom of the box to attach it all. Nice and neat.

Also installed an LED white light strip underneath with a switch in the side of the box. The switch is just barely visible in the box, far right. Just below the seat on the outside. Then it was a matter of putting it all back together……. The puppy approves.

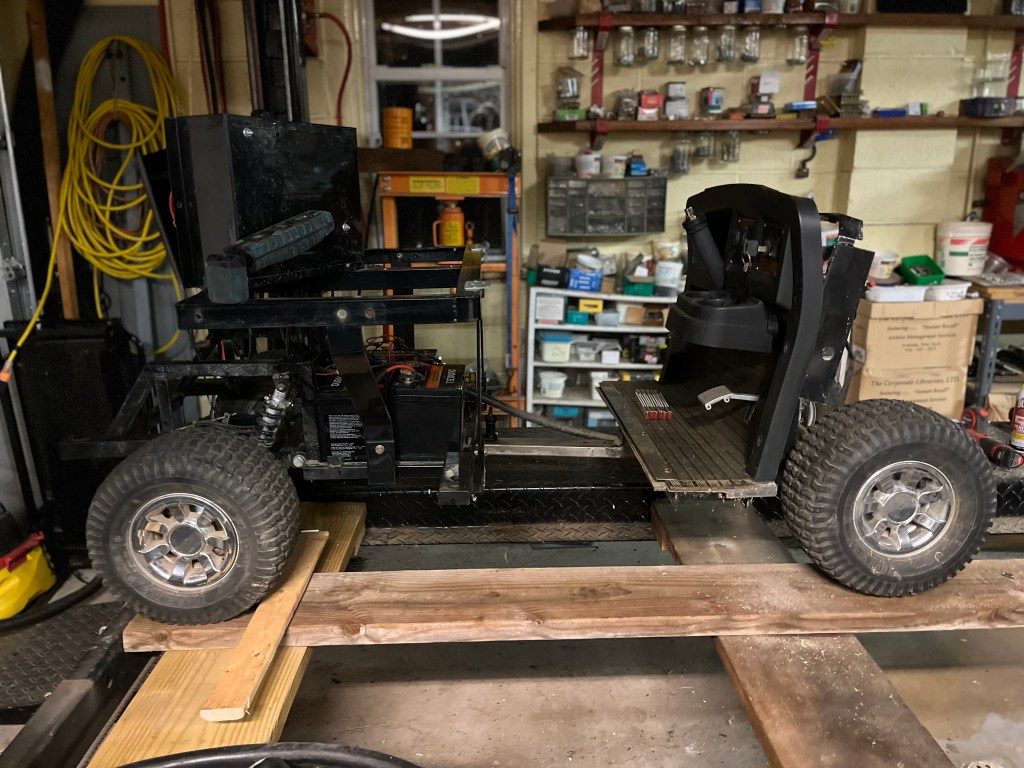
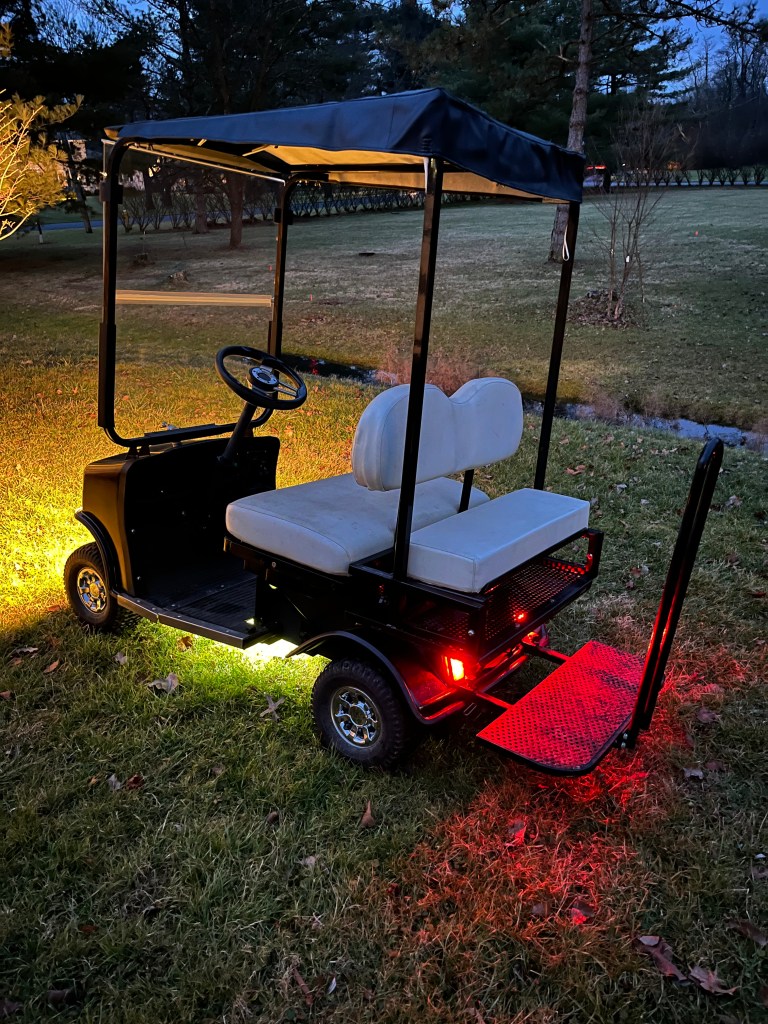
The big picture, note the new top.

Meanwhile it was time for the test drive. She chooches mightily fine. The 40A fuse is not popping. (I have a 100 just in case) The app shows some serious draws when accelerating, but they are smooth and brief. In cruise the draw is not bad at all. So we are going to call this done. Oh, added a hood ornament. It shall henceforth be known as the “Angry Duck”. Here are the glam shots….


UPDATE……June 2023
I have now used the cart for several days, and I must say that everything is working as planned. The performance is good. The endurance is good. The charging is fast enough. The hillclimbing is good. Keeping track of the batteries via Bluetooth is awesome. I’m gonna call this a big success.
Update. After chooching around on it all summer I must say the performance is still good. The only complaint I have is the ride. It is rough on anything other than smooth blacktop or concrete…..
